
A Build Book is an essential tool for any cosplayer looking to document their creative process for a cosplay contest. Using a build book template helps you stay organized, plan your project step by step, and showcase your craftsmanship. I am going to walk you through how to effectively use this build book template, breaking down the key sections and providing tips on how to make the most of it to ensure your cosplay journey is smooth and successful.
As conventions and cosplay contests continue to become more and more popular, so will they continue to get competitive. Build books have gone from reference photos during prejudging to being required at most elite cosplay contests, such as Word Cosplay Summit and Crown Championship of Cosplay. If you want to rise above your competitors in a cosplay contest, a well-made build book is an absolute must. We created this guide to help you build the best build book possible, and win that next Cosplay Contest.
Special Thanks to Imakeitsew Cosplay for allowing me to share this project.
Before you begin
While you are designing your cosplay, you need to design the build book. You want to make sure your build book matches the theme of your cosplay. When it comes to a theme, it could be where the book is just as much a character as the anime (such as death note). It could also be that you need to make one for a character from Critical Role (make it look like a tome from a D and D campaign) or Samus from Metroid. Every character is going to use some variety of written item on a fairly regular basis. Even if it is in the past or future, they still used scrolls, wrote on cave walls, and will have some variety of data pad). Be creative, and have some fun with it – it’s part of your cosplay build.
If you cannot come up with a theme to fit your character, use colors that match their theme, and create a magazine article that walks through your Cosplay build. Look to Cosplay Magazines, Anime magazines, and fashion magazines for inspiration.
I have designed this guide for the build book template in the store. It is 100% free to use for any contest. For this guide, I am going to use a build book from a cosplay I helped fabricate for Im8itsew Cosplay as Skippy the Magnificent from the Expeditionary force series by Craig Alanson. Skippy is an Ancient Artificial intelligence that assists a Colonel in the US Army save The Earth. Because the expeditionary force series has a very heavy theme with the US military, we decided to make the build book around a US military manual. After researching an assortment of different manuals, sheets, and forms around the internet we came up with a design theme.
Front Cover
This is just as important as the first impression with your cosplay. Design your cover to match your cosplay as best as you can. A clean, visually appealing cover not only sets the tone for your build book but also makes it a memorable keepsake to help you improve along your cosplay journey.

In the Case of Skippy, we wanted to have a “military manual” Motif to it, so that it looked like a manual someone would have to read about the character “Skippy”. As we said earlier, your build book should match a theme.
Page 1 – Table of Contents:
Having a table of contents (despite your build book being only ten to twelve pages) is important. This is where the judges can go to in a split second to find out where they want to look when they are pre-judging you. In prejudging, you only have a few minutes to show every good side of your cosplay. Having a TOC will help you utilize those few minutes better, giving judges those precious seconds to see your best work.
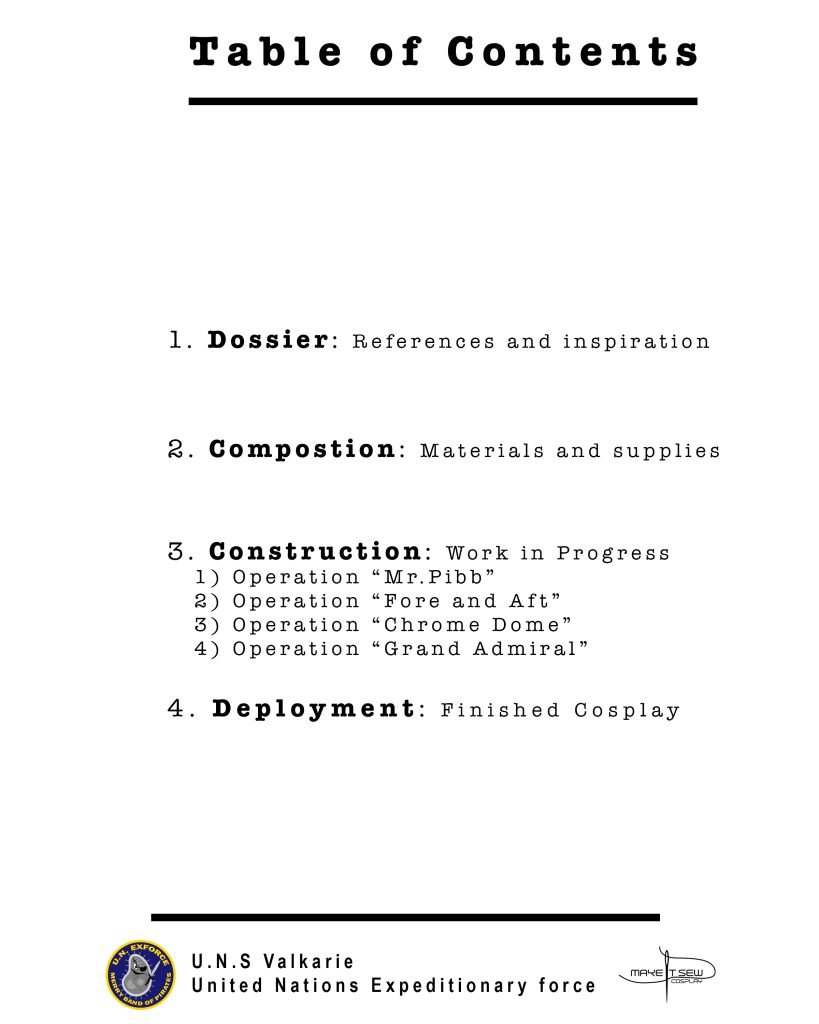
With the skippy build book, we broke everything down as if it would be as a mission debrief. Every specific part of the build has an “operation name”, and fits into the theme of it being a government manual.
Page 2 – References
Most Cosplay builds start with references and designs for your killer cosplay. Page two is where you put everything related to what inspired you to create this cosplay based upon the character. Make sure you have clear reference photos, and any descriptions that are used in the source material for your cosplay.

With Skippy, we did not have a lot of reference material, as the character comes from a book series. We utilized some fan art we found on the internet, and shared the description that was used in the book. If your character has more reference photos, I would suggest using more of those, and a small biography of the character. The objective of this page is to give a brief summary of the character you are cosplaying, in case the judges do not know who your character is.
Page 3 – Material and Supply List
The Material and Supply list tells the judges what materials and supplies you used for each part of the cosplay. This also shows the judges the amount of work and thought you put into each individual part of your cosplay, and how much material went into each part. This is very important. Make sure you list everything you use in the cosplay, as well as the ITEMS YOU DID NOT CRAFT. Most contests now require a percentage of a cosplay be hand-made (more on this in another blog). Make sure you list what you did not make at the bottom of the supply list. When working with the judges during pre-judging or when you are talking to them on the con floor, start with the things you did NOT make, so you can get that out of the way.

With Skippy, we wanted to make it look like a military acquisition list. each part of the cosplay is a separate item to acquire, with the materials it was used to make. We created fake part numbers for each item, then list on the bottom each part we did not make.
Page 5 – 10 – individual builds
Now that you have the references and supplies broken down, you can go through the individual builds. Each build section should go through a specific segment of build. As you are going though each build, make sure you have more pictures than paragraphs, and each section of the build goes through a segment of the build. If something happens during the build (For instance, you cut yourself while cutting foam). Make a joke about it. If you can make the judges laugh during prejudging (Remember – Judges are as nervous as you are when going through prejudging) YOU WILL get bonus points.
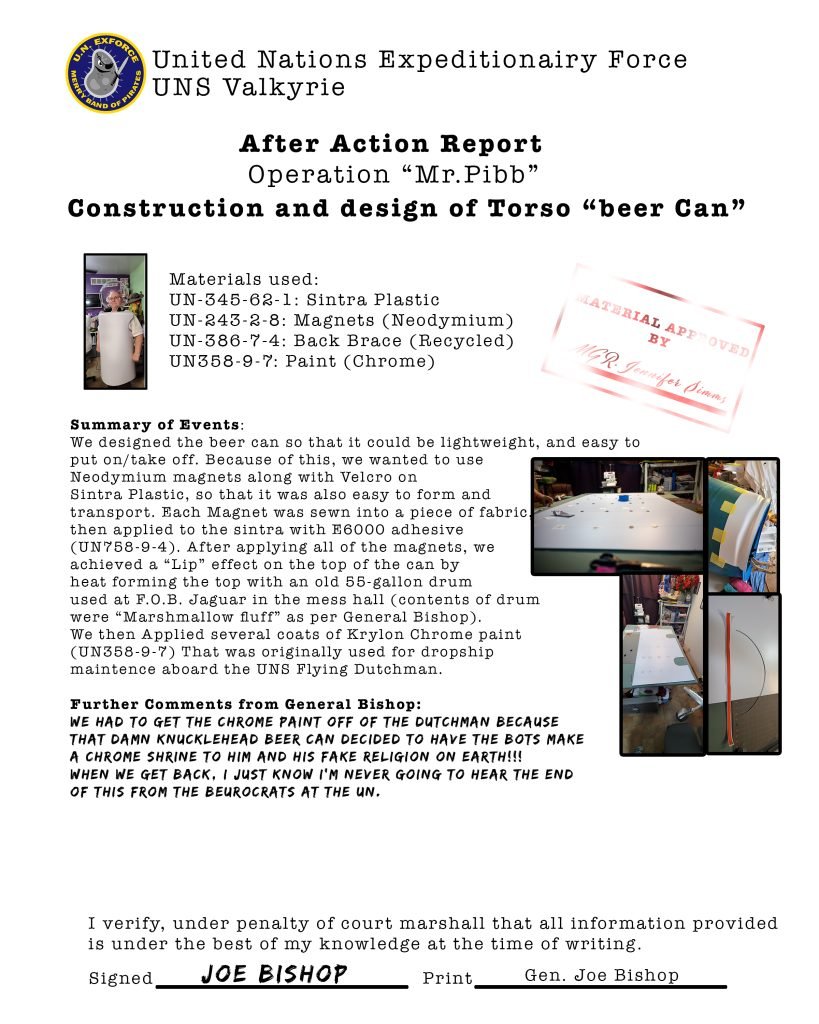


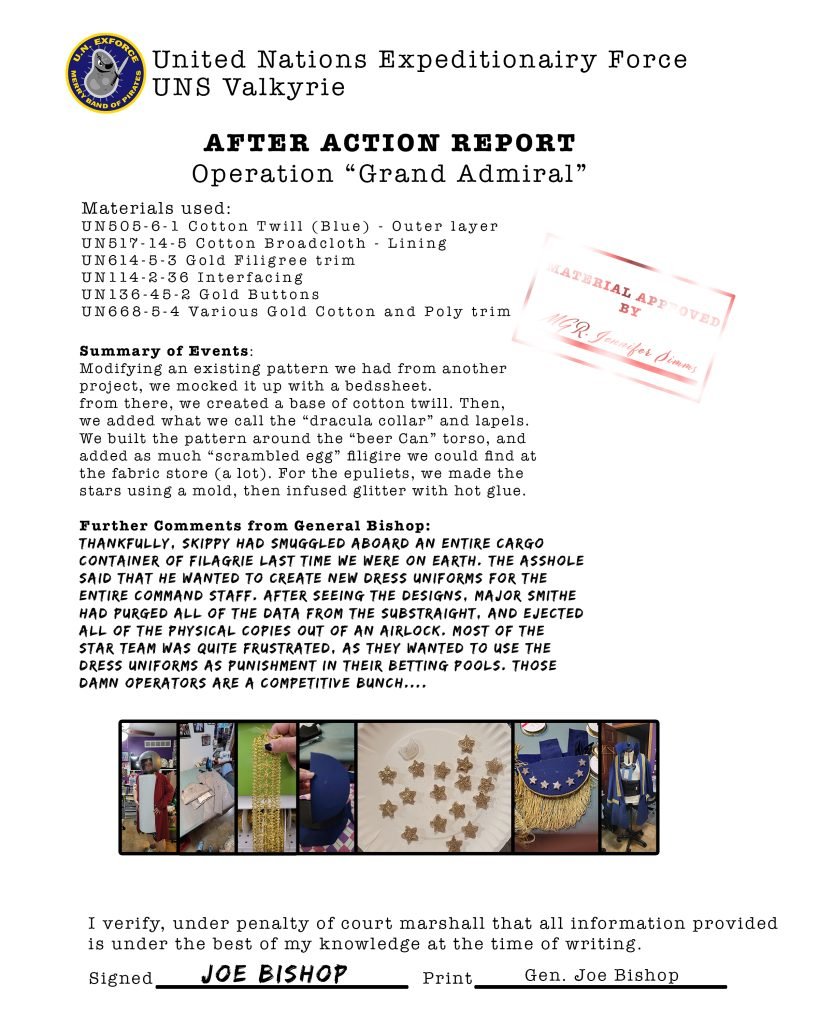
For Skippy, we broke down each part of the build based upon each major project. For instance, we used one page for creating the hat out of EVA foam, one for sewing the jacket, and one for building the helmet dome. We went through each part of the build (We didn’t have any major accidents on this project). to inject humor, we added small blurbs on the bottom of each one from another character in the book.
Final Page: Completed Cosplay.
This page shows what the completed cosplay looks like once you have finished the building. I would suggest hiring a pro photographer during the build, so you can get the best photos possible. I would suggest putting in a paragraph or two to discuss what you learned from the construction. This will show what you have learned from the build, and continue to inject a little humor into the book. In this page, make it more about the pictures. Put your cosplay in it’s best light.
For Skippy, we ended up in crunch, and we were unable to get photos done before the Contest. Because of this, we ended up shooting in the museum where the cosplay contest took place. We should have allowed more time to complete the cosplay, so we would be able to have better endgame photos. Crunch Sucks, and the results reflect that. Lesson Learned.
Using a build book template is an invaluable tool for organizing and streamlining the cosplay creation process. Whether you’re a beginner or an experienced cosplayer, a well-structured template ensures you stay on track. Remember, the endgame is to have a fun walkthrough of your cosplay build for pre-judging.
Need some help with the construction of a build book? Schedule a 30-minute consultation. We have vast experience building award-winning build books to help you win your next cosplay contest!